Easy Apple Crisp Mini Cheesecakes Recipe
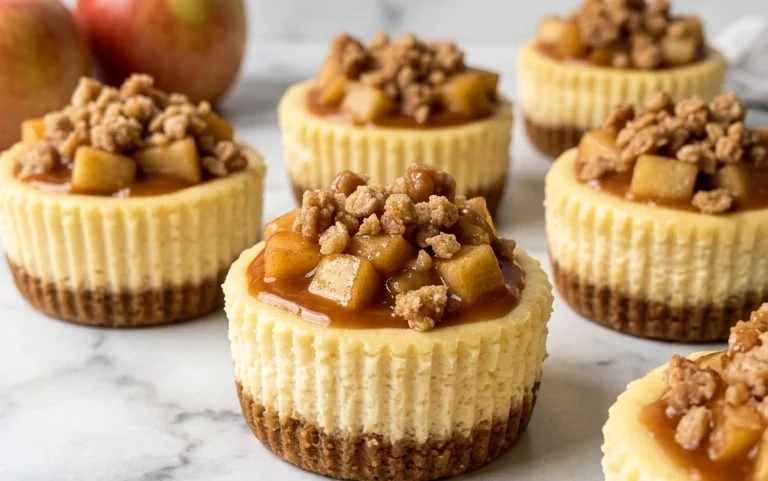
These Apple Crisp Mini Cheesecakes are like a little slice of autumn heaven, all in one bite. You know that feeling when you get the best part of an apple crisp – the buttery, crunchy topping and the sweet, spiced apples – all with a creamy cheesecake base? That’s what you get here, but in these adorable individual portions. They’re perfect for potlucks or holidays because they look so fancy, but honestly, they’re pretty straightforward to whip up. The graham cracker crust gives a nice salty-sweet foundation, and the cheesecake filling is perfectly tangy to balance the apple topping. Making Apple Crisp Mini Cheesecakes yourself means you control exactly how much spice and sweetness goes in, and they always impress guests. They really do capture that classic apple crisp flavor everyone loves, but in a dessert that feels a little more special.
Apple Crisp Mini Cheesecakes
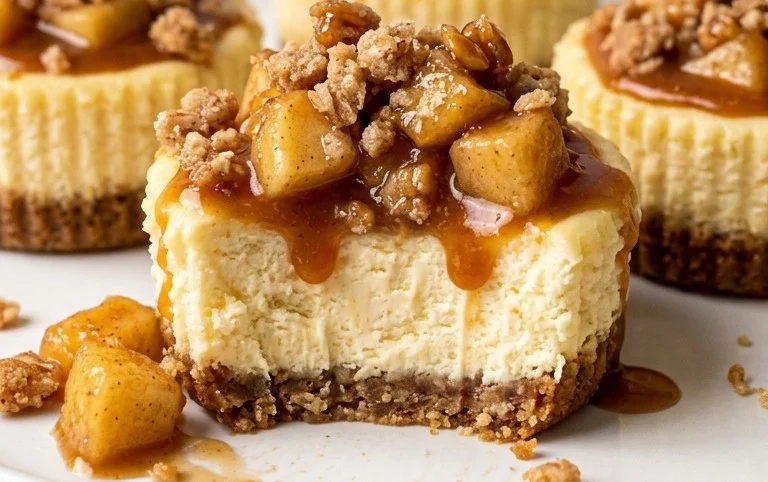
These mini cheesecakes capture all the cozy, comforting flavors of an apple crisp but in a perfectly portioned, elegant dessert. They have a creamy, tangy cheesecake filling nestled on a buttery graham cracker crust, all topped with a sweet and crunchy apple-cinnamon topping. They’re surprisingly simple to make, and the individual servings make them ideal for parties or just a special treat after dinner.
Ingredients:
- 3/4 cup graham cracker crumbs
- 1 and 1/2 Tablespoons sugar
- 1/2 teaspoon cinnamon
- 3 Tablespoons unsalted butter-melted
- 1/3 cup all-purpose flour
- 1/3 cup light brown sugar
- 1/3 cup quick-cooking oats
- 3/4 teaspoon cinnamon
- 1/8 teaspoon nutmeg
- 2 and 1/2 Tablespoons unsalted butter-melted
- 2 medium-small apples-peeled and chopped finely
- 2 teaspoons freshly squeezed lemon juice
- 1 and 1/2 teaspoons cinnamon
- 1/4 teaspoon nutmeg
- 2 Tablespoons light brown sugar
Making the Crust
First, we’ll get the bases for our mini cheesecakes ready. In a small bowl, combine the graham cracker crumbs, 1 and 1/2 Tablespoons of sugar, and 1/2 teaspoon of cinnamon. Give it a good stir to make sure everything is evenly distributed. Then, pour in the 3 Tablespoons of melted unsalted butter. Mix it all together until the crumbs are moistened and clump together when you squeeze them. This mixture will form the delicious foundation of each cheesecake. You’ll want to prepare a muffin tin for this. Line 12 muffin cups with paper liners. Then, divide the graham cracker mixture evenly among the lined cups, pressing it down firmly into the bottom of each liner. A small spoon or the bottom of a shot glass works well for this. You want a compact, even layer. This crust doesn’t need to be baked before adding the filling, as it will bake along with the cheesecake. Make sure to press it down well, as this is what will hold everything together.
Preparing the Apple Topping
Now, let’s get started on the apple topping, which will give our mini cheesecakes that signature apple crisp flavor. In a medium bowl, combine the 1/3 cup of all-purpose flour, 1/3 cup of light brown sugar, 1/3 cup of quick-cooking oats, 3/4 teaspoon of cinnamon, and 1/8 teaspoon of nutmeg. Whisk these dry ingredients together until they are well combined. Next, add the 2 and 1/2 Tablespoons of melted unsalted butter to this dry mixture. Stir everything together until it forms a crumbly texture, almost like wet sand. This is your apple crisp topping. Set this aside for now. We’ll add the apples to this mixture later, just before baking, to keep them from getting too mushy.
Creating the Cheesecake Filling
For the filling, you’ll need a simple cheesecake base. In a separate bowl, whisk together 8 ounces of softened cream cheese until it’s smooth and creamy. You can use an electric mixer for this if you have one, but a good whisk works too. Make sure there are no lumps. Then, gradually add 1/4 cup of granulated sugar and 1 large egg, whisking until just combined. Be careful not to overmix the filling once the egg is added, as this can introduce too much air and lead to cracking. You want a smooth, velvety texture. The cream cheese should be at room temperature to ensure it blends easily without lumps.
Assembling and Baking the Mini Cheesecakes
Now it’s time to bring everything together. Spoon the cream cheese filling evenly over the graham cracker crusts in each muffin liner, filling them about two-thirds of the way full. Don’t fill them completely to the brim, as they will puff up slightly while baking. Next, in the bowl with your prepared apple crisp topping mixture, add the finely chopped apples, 2 teaspoons of freshly squeezed lemon juice, 1 and 1/2 teaspoons of cinnamon, 1/4 teaspoon of nutmeg, and 2 Tablespoons of light brown sugar. Stir gently to coat the apples. You want to do this just before you’re ready to bake to prevent the apples from browning too much from the lemon juice. Evenly sprinkle this apple mixture over the top of the cheesecake filling in each muffin cup. Press the apple topping down very lightly, just enough to adhere it. Preheat your oven to 325 degrees Fahrenheit (160 degrees Celsius). Place the muffin tin on a baking sheet to catch any potential drips. Bake for 20-25 minutes, or until the edges are set and the centers are just slightly jiggly. They will continue to set as they cool. Overbaking can make them dry.
Cooling and Serving
Once baked, carefully remove the muffin tin from the oven. Let the mini cheesecakes cool in the muffin tin for about 10-15 minutes. This allows them to firm up before you attempt to remove them. After the initial cooling, carefully lift the paper liners out of the muffin tin and place them on a wire rack to cool completely. Chilling them in the refrigerator for at least 2 hours before serving is highly recommended. This helps the cheesecake filling firm up properly and allows the flavors to meld. Serve them chilled, perhaps with a dollop of whipped cream or a drizzle of caramel sauce if you’re feeling extra decadent. These mini cheesecakes are a delightful way to enjoy the flavors of apple crisp in a unique and elegant form. They are best enjoyed within 2-3 days when stored in an airtight container in the refrigerator.
Conclusion:
These Apple Crisp Mini Cheesecakes are a fantastic way to enjoy all the cozy flavors of apple crisp in an elegant, individual-sized dessert. The combination of the buttery graham cracker crust, the creamy cheesecake filling, and the sweet, spiced apple topping is a winner every time. They’re simple enough for a weeknight treat but impressive enough for any gathering. You can make the apple topping and crust ahead of time if you want to speed things up on the day you plan to serve them.
Serving Suggestions:
Serve them chilled or at room temperature. A tiny drizzle of caramel sauce or a small dollop of whipped cream on top makes them even more decadent. They’re wonderful on their own, too.
Variations:
Try using different kinds of apples for a more complex flavor – a mix of Granny Smith for tartness and Fuji or Honeycrisp for sweetness works well. You can also swap out the graham cracker crust for a gingersnap cookie crust for an extra spice kick. For nut lovers, add a tablespoon of finely chopped pecans or walnuts to the apple topping mixture.
Frequently Asked Questions:
Can I make these ahead of time?
Yes, you can definitely make these mini cheesecakes a day in advance. Store them covered in the refrigerator. The crust might soften slightly overnight, but they will still be delicious.
What kind of apples are best for the topping?
Apples that hold their shape well when cooked are ideal. Good choices include Honeycrisp, Fuji, Gala, or Granny Smith. Mixing a tart apple like Granny Smith with a sweeter apple like Honeycrisp gives a nice balance of flavors.
How do I prevent the cheesecakes from cracking?
These mini cheesecakes are much less prone to cracking than larger ones because of their size and the cheesecake mixture amount. Baking them gently and avoiding over-baking is key. Letting them cool slowly in the oven with the door ajar can also help.
Don’t be afraid to give these Apple Crisp Mini Cheesecakes a try. They’re a rewarding and delicious dessert that’s sure to become a favorite!
Apple Crisp Mini Cheesecakes
Delectable mini cheesecakes topped with a warm apple crisp mixture.
Ingredients
-
3/4 cup graham cracker crumbs
-
1 and 1/2 Tablespoons sugar
-
1/2 teaspoon cinnamon
-
3 Tablespoons unsalted butter-melted
-
1/3 cup all-purpose flour
-
1/3 cup light brown sugar
-
1/3 cup quick-cooking oats
-
3/4 teaspoon cinnamon
-
1/8 teaspoon nutmeg
-
2 and 1/2 Tablespoons unsalted butter-melted
-
2 medium-small apples-peeled and chopped finely
-
2 teaspoons freshly squeezed lemon juice
-
1 and 1/2 teaspoons cinnamon
-
1/4 teaspoon nutmeg
-
2 Tablespoons light brown sugar
Instructions
-
Step 1
Preheat oven to 350°F (175°C). Line a 12-cup muffin tin with paper liners. -
Step 2
In a small bowl, combine graham cracker crumbs, 1 and 1/2 tablespoons sugar, and 1/2 teaspoon cinnamon. Stir in 3 tablespoons melted butter until combined. Press mixture evenly into the bottom of each muffin liner. -
Step 3
In another bowl, combine flour, 1/3 cup light brown sugar, oats, 3/4 teaspoon cinnamon, and 1/8 teaspoon nutmeg. Cut in 2 and 1/2 tablespoons melted butter until the mixture resembles coarse crumbs. -
Step 4
In a separate bowl, toss chopped apples with lemon juice, 1 and 1/2 teaspoons cinnamon, 1/4 teaspoon nutmeg, and 2 tablespoons light brown sugar. -
Step 5
Spoon a small amount of cream cheese filling (prepared separately, not listed in ingredients) over the graham cracker crust in each liner. Top with a portion of the apple mixture. Sprinkle a generous amount of the oat topping over the apples. -
Step 6
Bake for 20-25 minutes, or until the cheesecakes are set and the topping is golden brown. -
Step 7
Let cool in the muffin tin for 10 minutes before transferring to a wire rack to cool completely. Refrigerate until ready to serve.
Important Information
Nutrition Facts (Per Serving)
It is important to consider this information as approximate and not to use it as definitive health advice.
Allergy Information
Please check ingredients for potential allergens and consult a health professional if in doubt.